Telegram bots have revolutionized the way we interact with digital platforms. These automated virtual assistants offer a plethora of functionalities, from providing swift customer support and boosting user engagement to handling complex tasks like payments. Whether you’re a tech-savvy developer seeking new challenges or a business owner aiming to streamline operations, mastering Telegram bot development with Python is a game-changer.
In this tutorial, we’ll guide you through the entire process of creating a Telegram bot from scratch. We’ll cover everything from understanding Telegram bots and their benefits, to setting up the necessary prerequisites, creating the bot using @BotFather, obtaining credentials, writing the Python code, and deploying the bot to the cloud. We’ll also explore PythonAnywhere, a free platform where you can deploy your bot for up to three months without cost.
What is a Telegram Bot?
A Telegram bot is a specialized account that doesn’t require a phone number to operate. These bots can interact with users, provide information, perform tasks, and even integrate with other services. They can respond to messages, send notifications, or even handle transactions. Businesses use Telegram bots for a variety of purposes, including customer support, marketing, and task automation.
Benefits of Telegram Bots:
- Automation: Automate repetitive tasks such as answering FAQs, sending reminders, or providing updates.
- 24/7 Availability: Bots can operate around the clock, providing uninterrupted service.
- Scalability: Easily scale the bot’s functionality to handle more users or perform more complex tasks.
- Integration: Bots can be integrated with other services like CRMs, payment gateways, and databases.
- Cost-Effective: Bots can significantly reduce operational costs by automating tasks that would otherwise require human intervention.
Prerequisites
Before diving into the development process, ensure you have the following:
- Python Installed: You’ll need Python installed on your machine. You can download the latest version from python.org.
- Telegram Account: You must have a Telegram account to create and manage your bot.
- Basic Python Knowledge: Familiarity with Python programming is essential for writing the bot’s code.
- Text Editor or IDE: An IDE like PyCharm, Visual Studio Code, or even a simple text editor will be necessary for writing your code.
Step 1: Creating the Bot Using @BotFather
@BotFather is a Telegram bot that helps you create and manage other bots. To create a bot, follow these steps:
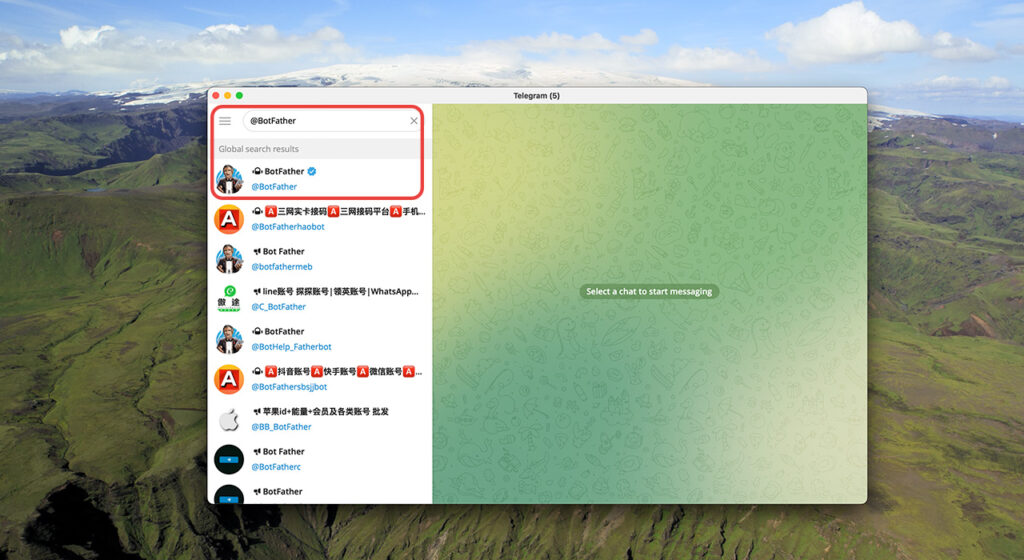
Open Telegram and Search for @BotFather:
- Open the Telegram app and use the search function to find
@BotFather. - Start a chat with
@BotFatherby clicking on it.
Create a New Bot:
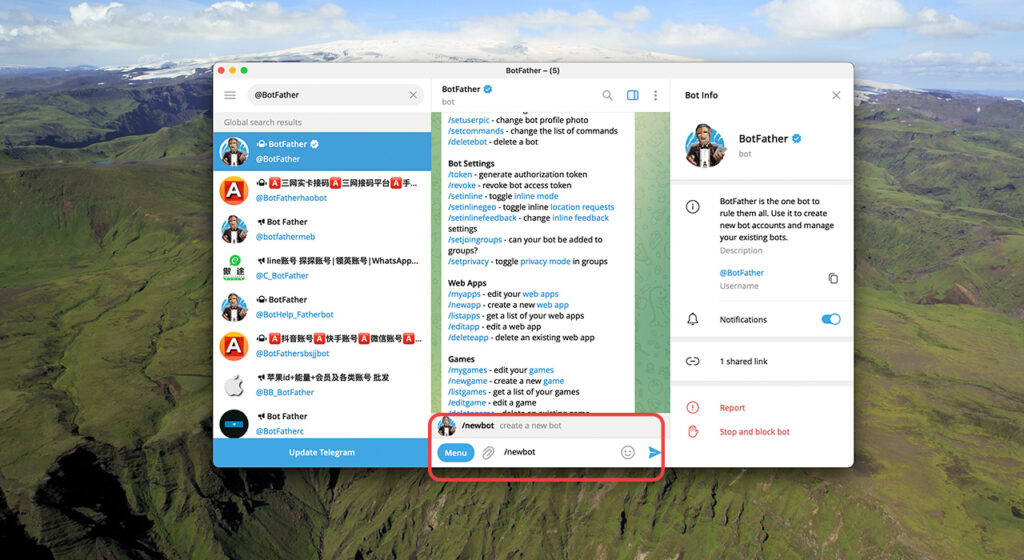
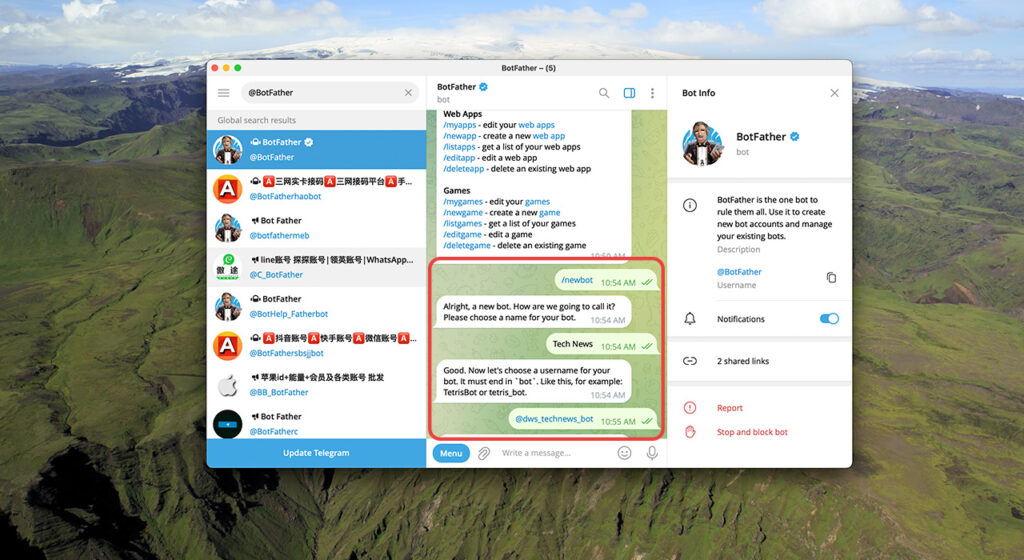
- Type
/newbotand send the message. @BotFatherwill ask for a name for your bot. Enter a descriptive name.- Next, you’ll be asked to choose a username for your bot. The username must end with “bot” (e.g.,
MyAwesomeBotorMyAwesome_bot).
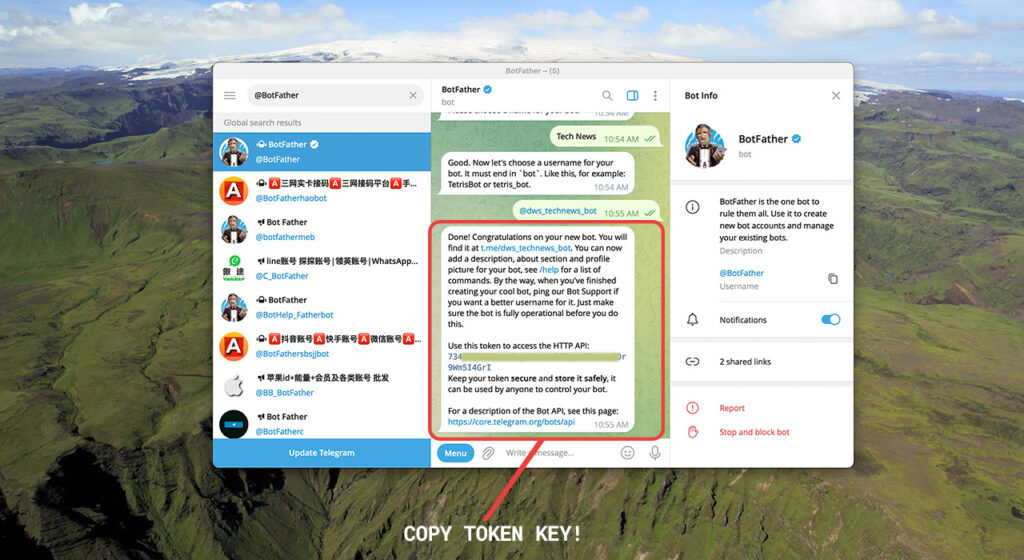
Receive Your Bot Token:
- After creating the bot,
@BotFatherwill provide a token. This token is crucial as it allows you to connect to the Telegram API and control your bot. - Keep this token secure; it’s essentially the password for your bot.
Step 2: Getting the Bot Credentials
To start programming your bot, you need to get the following credentials:
Bot Token: As provided by @BotFather.
Step 3: Writing the Python Code
With your bot credentials ready, you can start coding. Here’s how to build a basic bot that responds to user messages using the python-telegram-bot library:
Step 3.1: Install Necessary Libraries
You’ll need the python-telegram-bot library. Install it using pip:
pip install python-telegram-bot
Step 3.2: Writing the Basic Bot Code
from telegram import Update
from telegram.ext import Updater, CommandHandler, MessageHandler, Filters, CallbackContext

# Your bot token obtained from BotFather
BOT_TOKEN = 'YOUR_BOT_TOKEN'

def start(update: Update, context: CallbackContext) -> None:
    update.message.reply_text('Hello! I am your bot. Send me a message and I will echo it back.')

def echo(update: Update, context: CallbackContext) -> None:
    update.message.reply_text(f'You said: {update.message.text}')

def main() -> None:
    updater = Updater(BOT_TOKEN, use_context=True)

    dp = updater.dispatcher

    # Command handler for the /start command
    dp.add_handler(CommandHandler('start', start))

    # Message handler for text messages
    dp.add_handler(MessageHandler(Filters.text & ~Filters.command, echo))

    updater.start_polling()
    updater.idle()

if __name__ == '__main__':
    main()
Explanation:
- start: Handles the
/startcommand, sending a welcome message to the user. - echo: Replies with the same message that was sent to the bot.
- main: Sets up the updater and dispatcher, adding handlers for commands and messages, and starts polling for updates.
This basic bot reads any message sent to it and replies with the same message. It provides a foundation for more complex functionalities.
Step 4: Building a Sample Bot
Let’s create a simple bot that provides weather information using the python-telegram-bot library and the OpenWeatherMap API.
Step 4.1: Install the Necessary Libraries
Ensure you have the python-telegram-bot and requests libraries installed:
pip install python-telegram-bot requests
Step 4.2: Obtain an API Key for OpenWeatherMap
Sign up at OpenWeatherMap to get a free API key.
Step 4.3: Writing the Weather Bot Code
import requests
from telegram import Update
from telegram.ext import Updater, CommandHandler, CallbackContext

# Your bot token
BOT_TOKEN = 'YOUR_BOT_TOKEN'
WEATHER_API_KEY = 'YOUR_WEATHER_API_KEY'
WEATHER_API_URL = 'http://api.openweathermap.org/data/2.5/weather'

def start(update: Update, context: CallbackContext) -> None:
    update.message.reply_text('Send me a city name and I will provide the current weather information.')

def weather(update: Update, context: CallbackContext) -> None:
    city = ' '.join(context.args)
    if not city:
        update.message.reply_text('Please provide a city name.')
        return

    params = {'q': city, 'appid': WEATHER_API_KEY, 'units': 'metric'}
    response = requests.get(WEATHER_API_URL, params=params)
    data = response.json()

    if data['cod'] == 200:
        weather_info = f"The weather in {city} is {data['main']['temp']}°C with {data['weather'][0]['description']}."
    else:
        weather_info = "Sorry, I couldn't find the weather for that location."

    update.message.reply_text(weather_info)

def main() -> None:
    updater = Updater(BOT_TOKEN, use_context=True)

    dp = updater.dispatcher

    # Command handler for the /start command
    dp.add_handler(CommandHandler('start', start))

    # Command handler for the /weather command
    dp.add_handler(CommandHandler('weather', weather))

    updater.start_polling()
    updater.idle()

if __name__ == '__main__':
    main()
Explanation:
- start: Handles the
/startcommand, instructing users on how to use the bot. - weather: Fetches weather data for a given city from OpenWeatherMap and replies with the information.
- main: Sets up the updater and dispatcher, adding handlers for commands, and starts polling for updates.
This bot listens for the /weather command followed by a city name, fetches weather data, and responds with the current weather.
Step 5: Deploying to the Cloud
Once your bot is ready, you’ll need to deploy it to a cloud service so it can run 24/7. There are several cloud providers to choose from, each offering unique benefits.
Choosing the Best Cloud Provider
- AWS: Offers a robust and scalable environment but can be complex and costly for beginners.
- Google Cloud: Provides high-performance computing, but similar to AWS, it might be overkill for a small bot.
- Heroku: A good option for beginners, offering easy deployment with limited free resources.
- DigitalOcean: Affordable and simple to use, suitable for small to medium-sized bots.
Deploying on PythonAnywhere
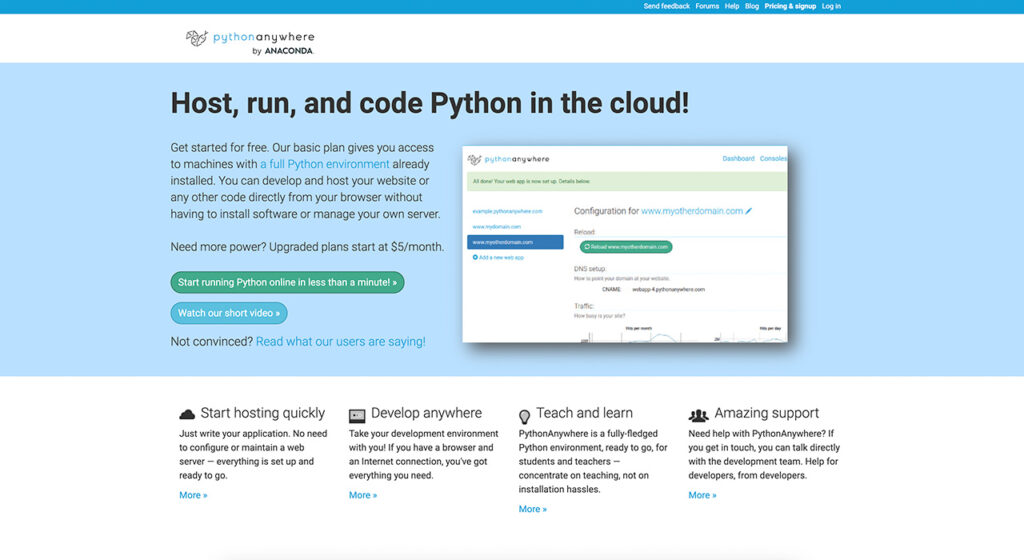
PythonAnywhere is an excellent platform for deploying small Python applications like a Telegram bot. It’s beginner-friendly and offers a free tier that allows you to run your bot for up to three months.
Step 5.1: Sign Up and Set Up Your Environment
- Sign Up at PythonAnywhere:
- Visit PythonAnywhere and create a free account.
- Create a New Console:
- Once logged in, go to the “Consoles” section and start a new Bash console.
- Clone Your Bot’s Code:
- Use Git or upload your bot’s code directly to PythonAnywhere.
- Install Dependencies:
- In the Bash console, install the necessary Python packages:
pip install requests python-telegram-bot -U
Step 5.2: Run Your Bot
PythonAnywhere will keep your bot running for free for up to three months. After that, you may consider upgrading to a paid plan or switching to another provider.
Conclusion
Building a Telegram bot using Python is a rewarding experience that can serve many purposes, from automating tasks to engaging with users. By following this guide, you’ve learned how to create a bot, write the necessary Python code, and deploy it to the cloud. Whether you’re looking to build a simple bot or something more complex, the possibilities are endless.
With platforms like PythonAnywhere offering free deployment options, there’s no better time to start building your Telegram bot.
Unlock Your Business Potential with Custom Telegram Bots

Transform the way you engage with your audience! Our expert Telegram Bot Development Services offer tailored solutions to automate tasks, boost interaction, and grow your business. Get started today and elevate your digital presence.


